Most people see a Plastisol-coated part and assume it was a simple thing to do.
Just a quick dip in a vat of liquid plastic and, like magic, the part comes out with a bright, flawless coating. Sounds easy, doesn’t it?
Well, like most things in life, coating parts in Plastisol isn’t as simple as it might appear! Few people realize the amount of work it takes ‒ not to mention the variables that must come into play ‒ to get the perfect coating.
In fact, it’s rare that any two components are coated in exactly the same manner!
Here are just a few of the questions you’ll need to answer (and trials to overcome) if you’re aiming to achieve the best Plastisol coating, including:
- Will the part be fully or partially coated?
- Which areas of the part must be coated?
- What thickness and hardness is required?
- What about colour?
- Any special end-use requirements?
1. Will the Part Be Fully or Partially Coated?
In a dip coating process, the component is attached to the equipment (either by hanging the component or fixing it to tooling) and then lowered into a bath of liquid Plastisol.
If the component is to be fully dip-coated, we need to know which area of the component will be allowed to have an uncoated touch mark or bare spot from the tooling used to hold it. This information determines how to hang the part for immersion.
Depending on the footprint of the equipment’s dipping area, the way in which we hang the component can greatly influence throughput and go a long way in determining the cost of Plastisol dip coating.
2. Which Areas of the Part Must Be Coated?
Along the same lines, we need to know which portion of the component will be coated and which will be exposed and which when the part is to be partially dipped. From there, it can be determined whether the best course of action is to:
Hold the component on the undipped area for immersion;
Trim Plastisol from the component after coating; or
Incorporate masking into the dip coating process.
Again, these factors go a long way in determining the cost to run the part!
3. What Thickness and Hardness Is Required?
Plastisol can be applied thick or thin, depending on the part’s application. Generally, the thickness achieved through a dip coating process ranges from 0.75mm to 2mm.
The formulation and curing process can be adjusted to achieve hardness ratings between 5 Shore A and 80 Shore D.
4. What About Colour?
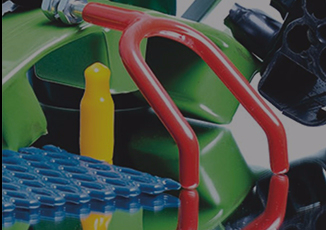
Plastisol comes in a number of standard colours including black, red, white, blue, green and yellow. Since we make our own Plastisol in-house here at Plastico Industries, we can manufacture custom colors to suit your specific needs. This also lets us control the process from start to finish, cutting back both on waste and additional distribution channels!
5. What Will Be the Component’s End Use?
The remarkable durability of Plastisol coating makes it ideal for a huge variety of applications, from the eliminating BSR in the automotive industry to the military, agriculture, and even the home markets. Knowing the component’s eventual destination and use allows us to customize the substance to meet special requirements such as UV protection, food grade standards, and durometer requirements.
Other Dip Coating Trials and Tribulations
Once these basic questions are answered, we can come up with a process that will achieve the best possible results for the component in question. That’s where we really get down to business! Some of the other factors to consider when formulating a full or partial dip coating process include:
- Drips: Depending on how the part is attached to the tooling, drips can occur during the dipping process. Before the process begins, it must be determined where on the component drips are acceptable and whether we can trim them off later.
- Pooling: If the part is concave or cup-shaped, Plastisol can pool in the inward areas, where it will become too thick and not cure properly.
- Tooling: Will the existing tooling work for this process, or will new tooling have to be made? This, too, will ultimately impact the process’s overall cost.
- Curing: Parts must be preheated, dipped and then cured. The preheating and curing temperatures are determined based on the part’s raw material, size and thickness. If the product needs to be preheated for longer, or requires a longer dip time, this will shore up the cycle times and influence cost via throughput.
- Packaging: Once the part has been processed, we need to know the packaging and labelling requirements. Will it require any special testing or certification?
All in all, it’s safe to say that the Plastisol coating process is not nearly as clear-cut as you’d think! There’s a whole lot you need to consider before, during and even after the component is coated.
That’s the advantage of having 20+ years in the business...we’ve seen it all, so we know exactly how to tackle the many trials, tribulations and pitfalls of Plastisol. Our team handles all the nitty-gritty details so you don’t have to!
Questions? Need a hand? Reach out to us online or call us toll-free at 1-866-543-3334.